Xblock installation and uninstallation
XBlock Installation
For this tutorial we’ll install an XBlock named In Video Quiz XBlock which, as the name implies, will allows for edX components to be displayed to users inside of videos at specific time points. This XBlock was written by the Open edX programming team at Stanford University and is freely available on Github. Like many XBlocks the functionality works great, but the documentation is sparse.
Before moving further we have some installation choices, you can install Xblock packages anywhere in your Ubuntu server. But it is recommended not to install Xblock anywhere inside the edx directory.
The below are the main steps we need to follow:
Clone the XBlock Git repository
Before moving to any step we first need to clone the Git repository of our XBlock that is where the xblock-in-video-quiz is stored. For this we will need the HTTP URL for the repository which we want to clone, you can find the link at the right hand side of the repository you will see a “Clone or download” button, Click on the button and you will see the link.

Afterwards, paste the URI of the repository onto the command line so that you have a command line that looks like the following:
git clone https://github.com/Stanford-Online/xblock-in-video-quiz
Change the owner of repository
Once you have successfully cloned the repository, the next task will be to change the ownership of the repository which means to change the user and the group of the directory. To change the owner use the below command
sudo chown -R edxapp xblock-in-video-quiz/
To change the group use the below command
sudo chgrp -R edxapp xblock-in-video-quiz/
Run pip command
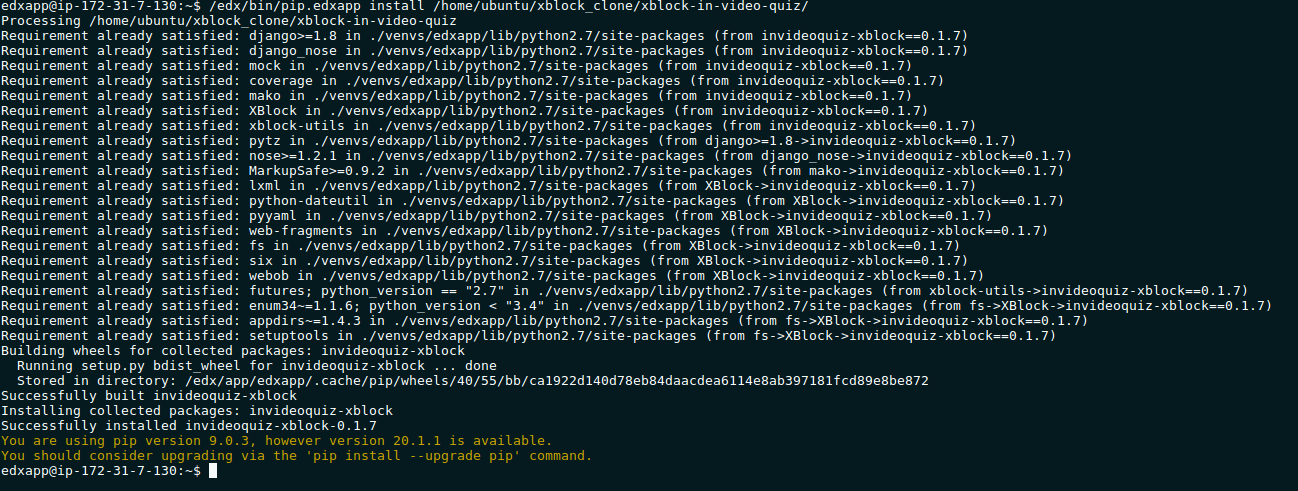
After changing the owner of the repository we need to install our XBlock for this we need to run the pip command that will help us to install the XBlock, we don't need to do any manual work for that.
Install the Xblock by running the below command:
/edx/bin/pip.edxapp install /home/ubuntu/xblock_clone/xblock-in-video-quiz/
Compiling the Assets
At this moment your Xblock wont work yet until you compile all of its assets. To compile the assets manually we need to run the below commands:
cd /edx/app/edxapp/edx-platform
paver update_assets cms --settings=aws
paver update_assets lms --settings=aws
You should see a success message after each time you run paver.
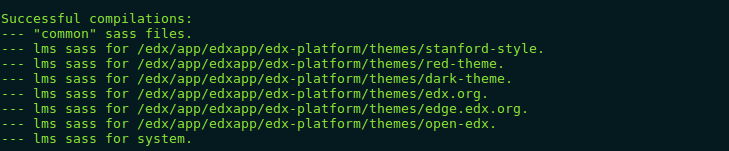
Note that you should not edit or save any file while the paver is running because it can corrupt the file.
Restart LMS and CMS
Now we have to restart the LMS and CMS by using the below command
sudo /edx/bin/supervisorctl restart lms cms

Note that at the time of restart neither the instructor, staff or student can access the system, they have to wait until the system completes to restart.
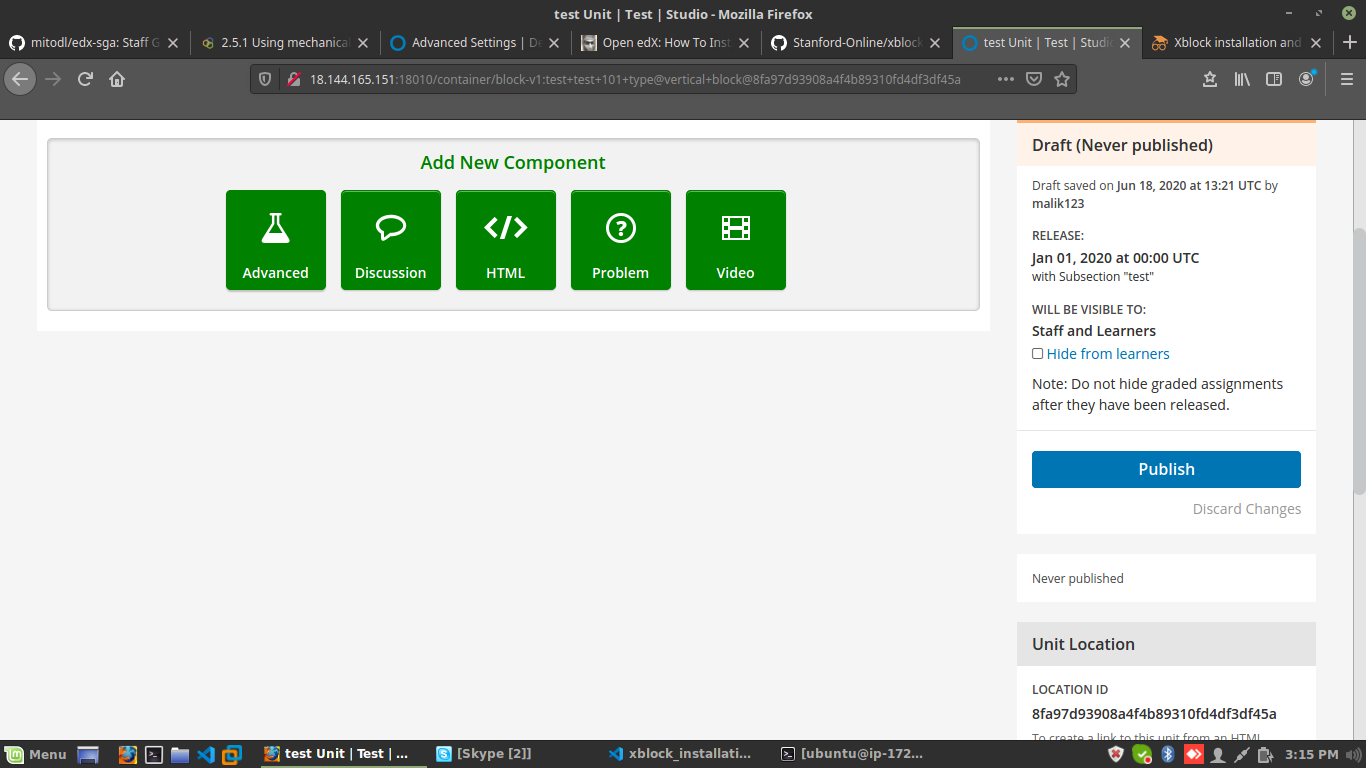
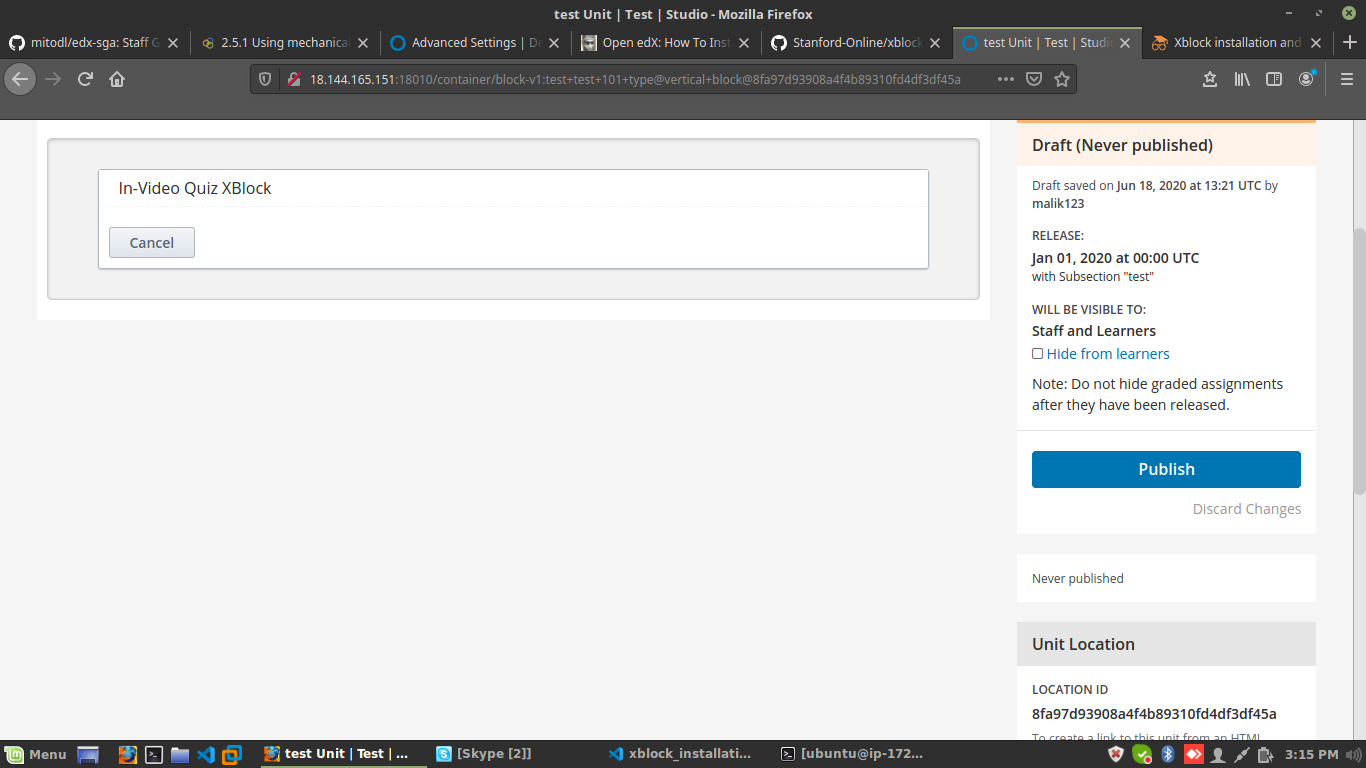
Testing Xblock
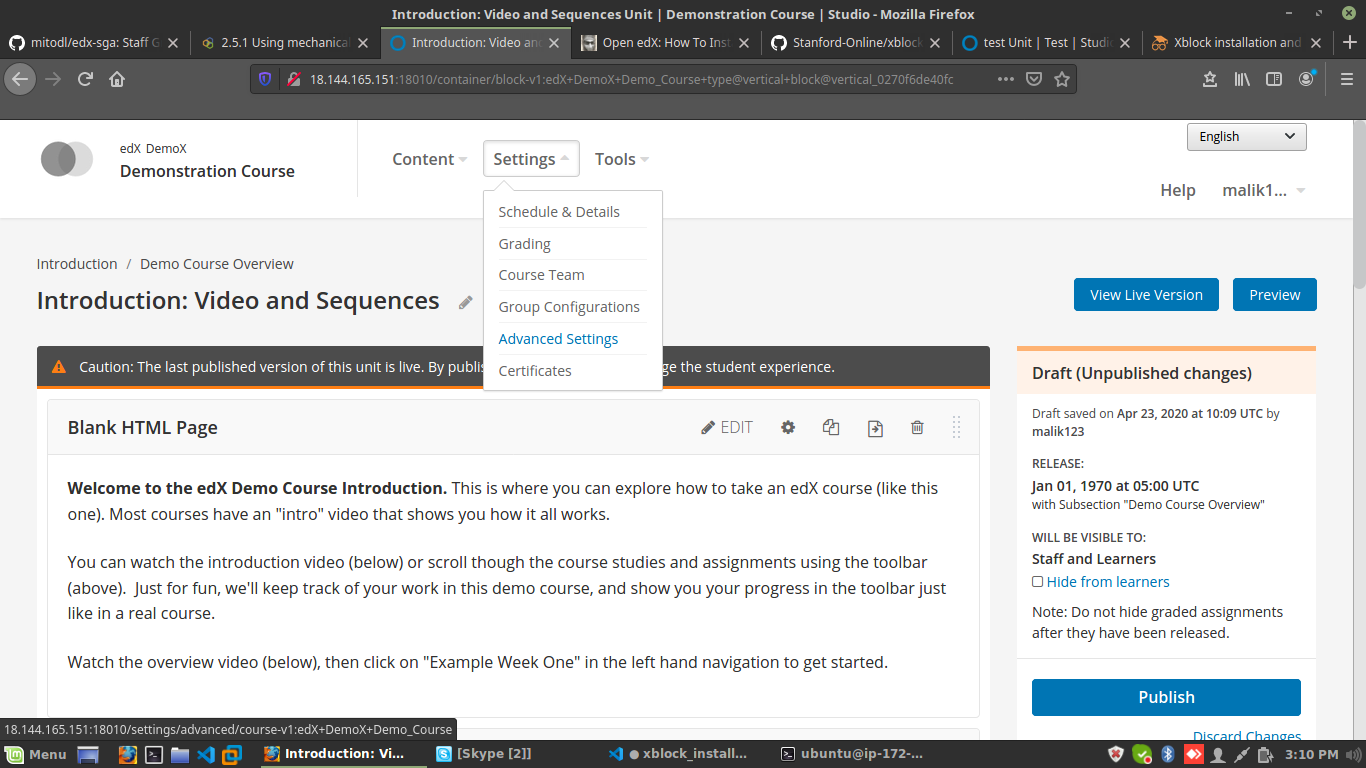
Xblock does not directly appears to your CMS, To include the XBlock to your course follow the below steps
Go to settings and click on Advance Settings
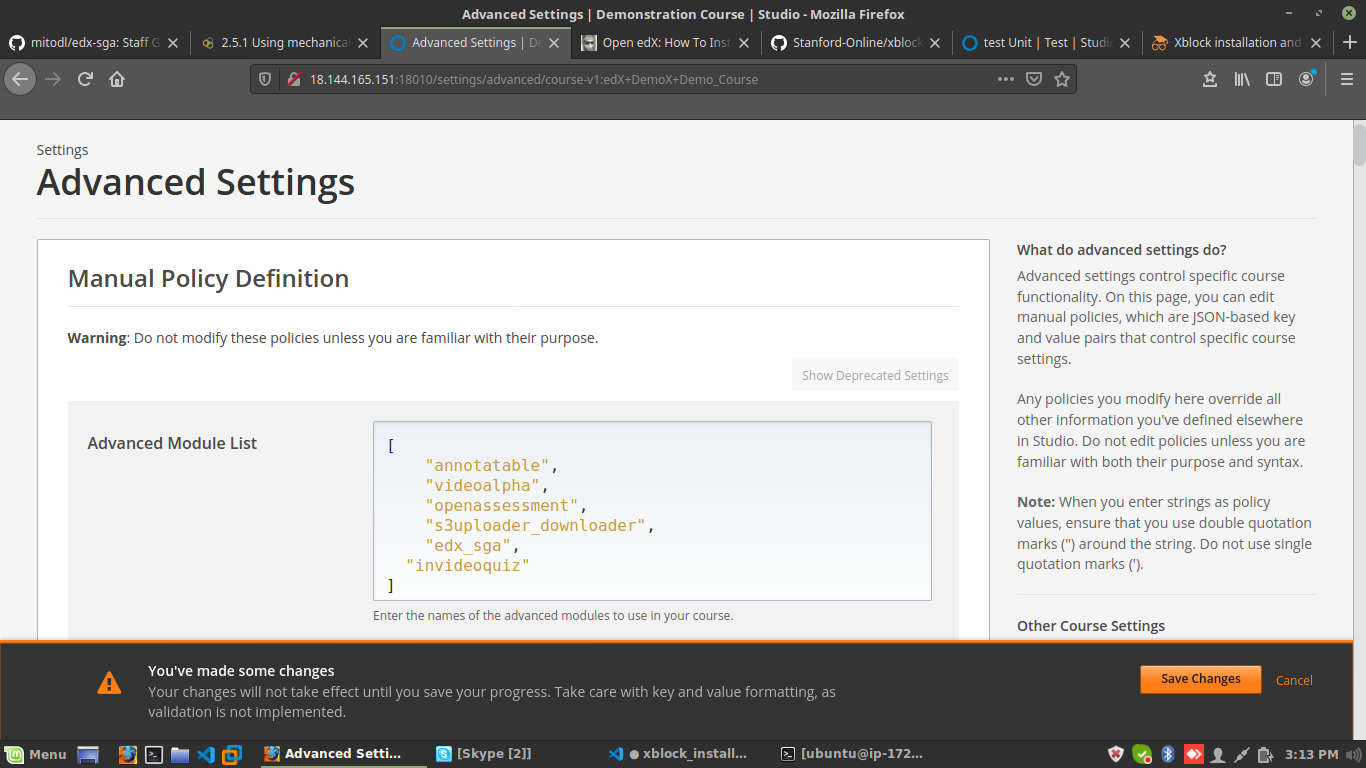
In Advance settings you will see Advanced Module List where you will need to add the name of the XBlock in our case its invideoquiz and then click on save changes.
Now you will see the Advance option in the course unit and will see your Xblock.
Xblock Uninstallation
List down XBlocks
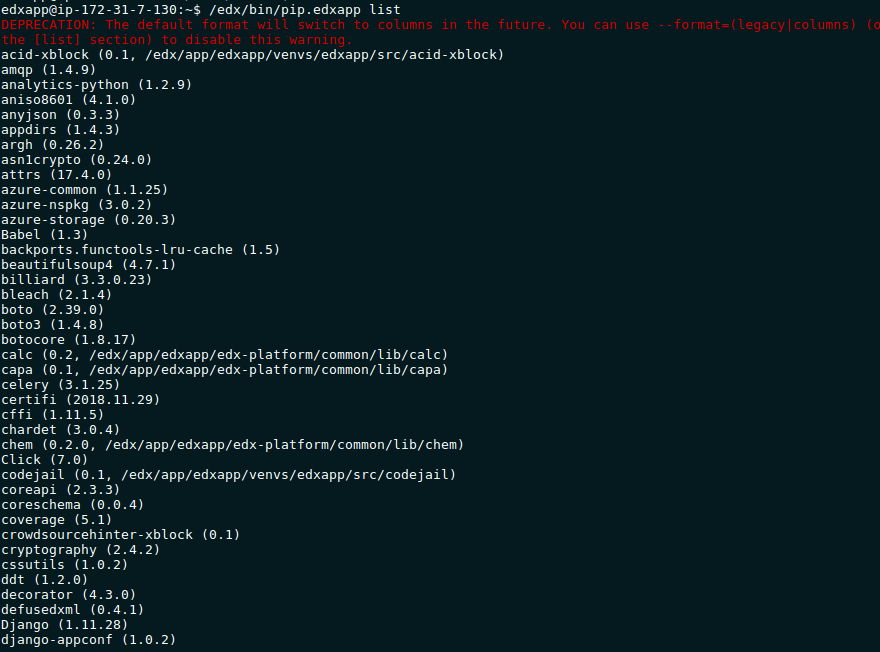
To uninstall an XBlock you will have to follow the command similar to installation process.
First list down the installed XBlock by using the below command:
/edx/bin/pip.edxapp list
Uninstall XBlock
Note the name of the XBlock you want to uninstall and use the below command to uninstall it.
/edx/bin/pip.edxapp uninstall THE-REGISTERED-NAME-OF-THE-XBLOCK-TO-UNINSTALL
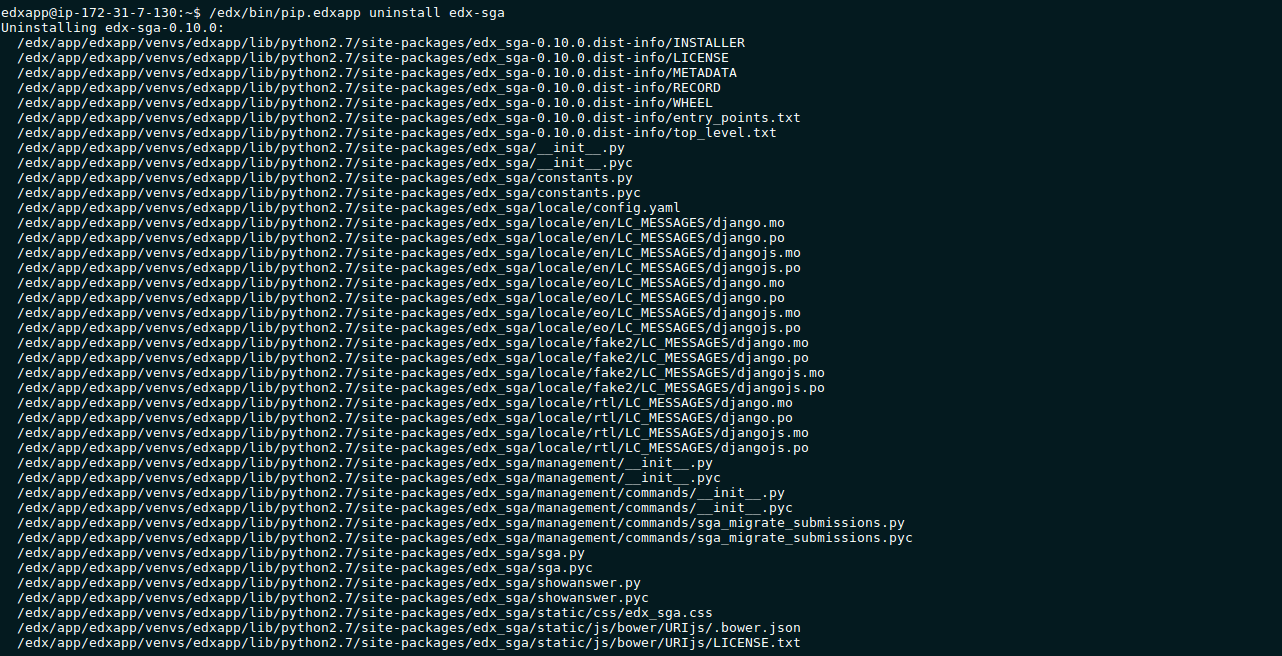
After that you will be asked for confirmation for uninstallation click y to confirm and then you will see a success message for uninstallation.

Update XBlock
List down XBlocks
To update an XBlock you will have to follow the command similar to uninstallation process.
First list down the installed XBlock by using the below command:
/edx/bin/pip.edxapp list
Use pip to update
After listing down all the XBlock use the pip command to update the desired XBlock.
pip install -U invideoquiz-xblock