DCAS Open EdX Documentation

DCAS Open EdX Documentation

  • Docs

›Creating a Course

Creating a Course

  • Create a New Online Course
  • Set Course Schedule & Details
  • Add Sections, Subsections & Units
  • Managing Unit and Component
  • Adding Videos
  • Adding HTML
  • Adding Discussions
  • Adding Problems

    • Adding Problems
    • Problem Types
    • Drag and Drop
    • Pointing on a picture
  • Adding Images and Figures
  • Uploading Static Content
  • Course Visibility
  • Creating pages
  • Grading
  • Commonly Used Advanced Settings

Running a Course

  • Managing Certificates
  • Common Instructor Dashboard Tasks
  • Managing Course Discussions

Advanced Management

  • Importing / Exporting Courses
  • Change a user’s password
  • Inactivate / Activate a User
  • Understanding User Roles
  • Set a user to staff or superuser
  • Server Tasks

    • SSH into Server
    • Set or Change a Password

Migration

  • Migrate EdX (Single-Server)
  • Migrate the Theme

Migrate MySQL

  • Migrating MySQL Database off of Single-Server

Migrate Mongo

  • Migrating Mongo Database off of Single-Server

Configuration

  • Enable and Update Additional Languages
  • Enable Downloads from Instructor tab in LMS
  • Configure and Enable Certificate
  • Configure Open Response Assessment

Configure Ecommerce

  • Basic Ecommerce Setup
  • Setup JWT Keys
  • Getting Course Details on Checkout Page
  • Troubleshoot Ecommerce

Discovery Setup

  • Configure Discovery

Comprehensive theming

  • Setup Comprehensive Theming

Microsites

  • Setup Microsites
  • Common Microsite Configurations

API

  • Setup API
  • Common APIs Demonstration
  • Customizing an API
  • DCAS API Handoff for LMS

Xblock

  • Xblock introduction
  • Xblock installation and uninstallation
  • Xblock Development

Scaling the architecture

  • Scaling Mongo
  • Scaling MySQL
  • Dedicated Storage Configuration Outline
  • Azure Storage Configuration

    • Azure Storage Configuration
    • Basic Configuration
    • Private Blob Configuration

SCORM

  • SCORM Azure Storage

Trouble-Shooting

  • Forgot admin username or password
  • Server error
  • Can't reach your site
  • Problems with RabbitMQ
  • Can't login to LMS or CMS
  • Locate the error
  • Jobs are stucking
  • Mongodb not working
  • Forums Breaking Issue
  • Check open edx services status
  • Problem with mysql
  • Can't receive email
  • CSRF token error

Set Course Schedule & Details

The Course Schedule & Details Page is a page in Studio where you can set high level course details such as start date, description, course image, etc.

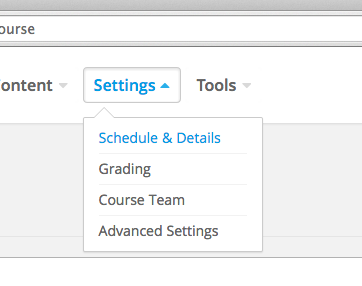
  1. From Studio, select Settings > Schedule & Details. Schedule Courses

  2. Set Course Schedule Details. Schedule Details

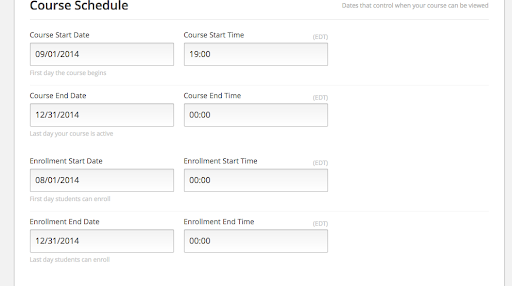
    1. Course Start Date and Time – This is the date and time that the course content will first be available to students, if they are enrolled. Note that even though this sets the overall start date, you can still have different start times for different sections & sub-sections in the Outline. If you would like your course to be available as soon as you make it, then set a start date in the past.
    2. Course End Date and Time – This is the date and time that the course content will become unavailable. Students who try to access content after this date will be locked out. This field is optional and can be left blank.
    3. Enrollment Start Date and Time – This is the date and time that students will be able to start enrolling in the course from the /courses page. Even though they may enroll on this date, they can’t access course content until the start date. This must be set in the past in order for the course to appear in the course catalog.
    4. Enrollment End Date and Time – This is the date and time after which students will be locked out from registering for the course.
  1. If you want to hide a course from your course catalog.

    1. Option 1: Set the enrollment date to a future date. Note that enrollment date must come before start date, so this only works if your course shouldn’t be accessible at all.
    2. Option 2: Go to the 'Advanced Settings' > Then look for 'Course Visibility in Catalog' > Change "both" to "none" and save the changes.
  2. Set Introducing Your Course details.

    1. Course Short Description – This appears on the course catalog page when students roll over the course image. Limit to 150 characters
    2. Course Overview – This is an HTML input box with several pre-formatted areas for description, prerequisite, faq, etc. You can include images here as well with an ref.
    3. Course Image – Upload the course image which will show up on the course catalog and a user’s course listing.
      1. Images should be 375 x 200.
    4. Course Introduction – This is an optional video. Enter only the Youtube ID. So https://www.youtube.com/watch?v=-pd8DITrk0M becomes -pd8DITrk0M.
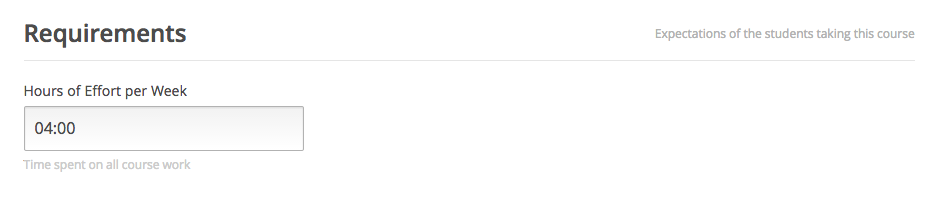
  3. Set Requirements Section.

    1. Hours of Effort per Week – Optional text box to let students know the expected weekly time commitment. Hours of Efforts per week
← Create a New Online CourseAdd Sections, Subsections & Units →
DCAS Open EdX Documentation
Docs
Create an Online Course
More
Curricu.me Website
Copyright © 2022 DCAS