Basic Ecommerce Setup
For ecommerce setup, we have to make changes to the json, yml and Django Admin files for configurations.
Log onto server
Switch to edxapp user
sudo -H -u edxapp bash
source /edx/app/edxapp/edxapp_env
cd /edx/app/edxapp
Open lms.env.json file and configure it with the following values:
ENABLE_OAUTH2_PROVIDER: true
JWT_AUTH: https://my-edX.com/oauth2
JWT_ISSUER: https://my-edX.com/oauth2
ISSUER: https://my-edX.com/oauth2
OAUTH_OIDC_ISSUER: https://my-edX.com/oauth2
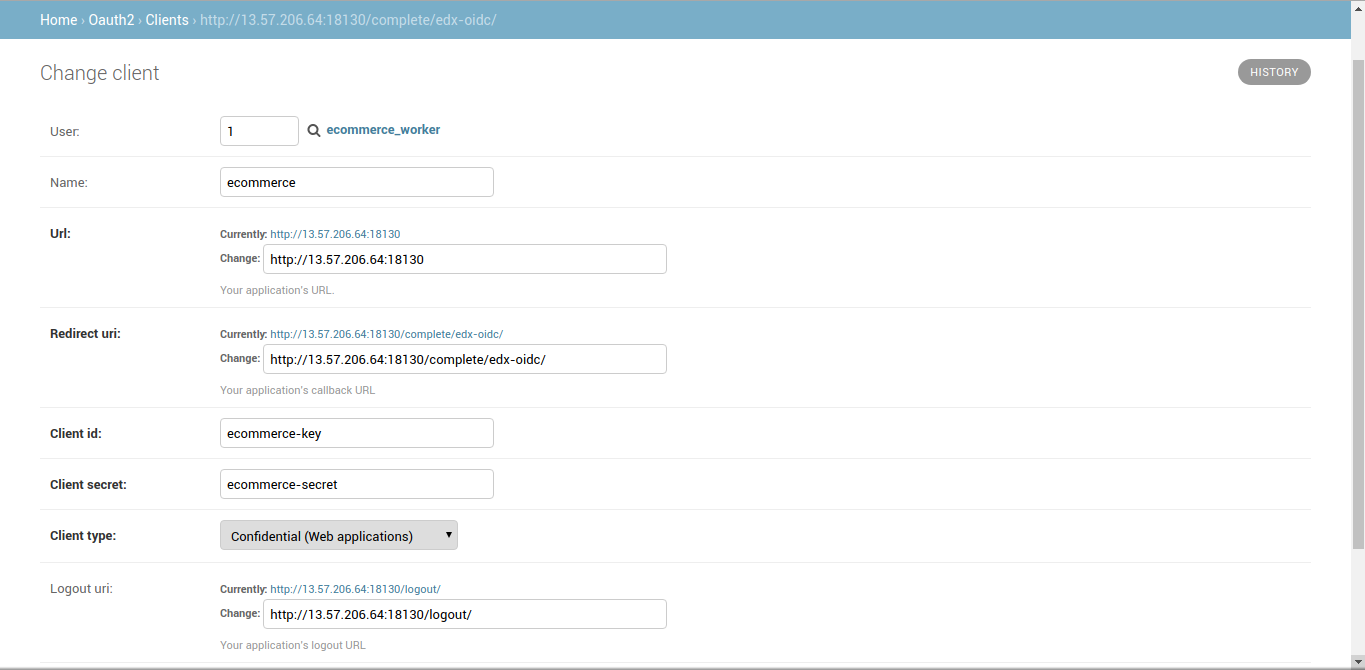
1. Create and Register a Client
Configured Django Admin, added eCommerce client:
Url: https://my-edX.com:18130
Redirect Uri: https://my-edX.com:18130/complete/edx-oidc/
Client id: ecommerce-key
Client secret: ecommerce-secret
Client type: Confidential (Web applications)
Logout uri: https://my-edX.com:18130/logout/
Screenshot for reference:
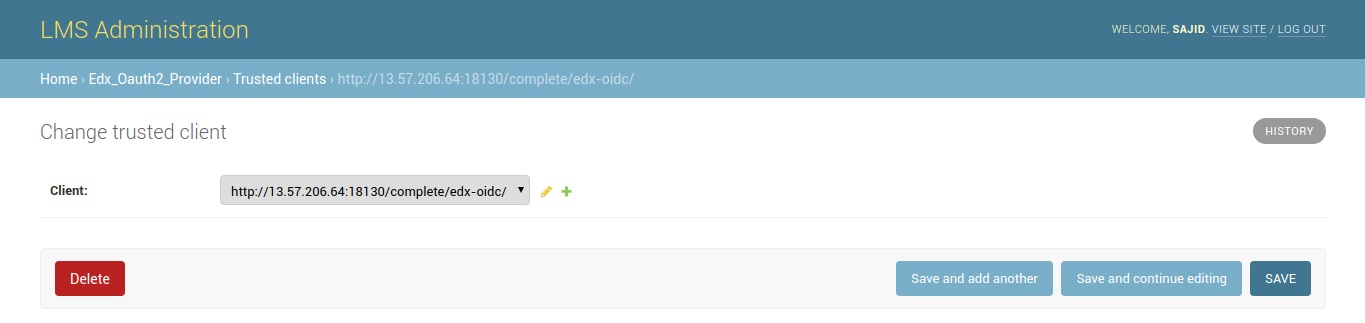
2. Designate the Client as Trusted
After you create your client, designate it as trusted. Trusted clients bypass the user consent form that usually appears after the system validates the user’s credentials. To designate your client as trusted, if the client is not automatically created follow these steps:
Home › Edx_Oauth2_Provider › Trusted clients
- In your browser, go to https://my-edX.com/admin/oauth2_provider/trustedclient/add/.
- In the OAuth 2.0 clients list, select the redirect URL for the client that you just created.
- Select Save.
Screenshot for reference:
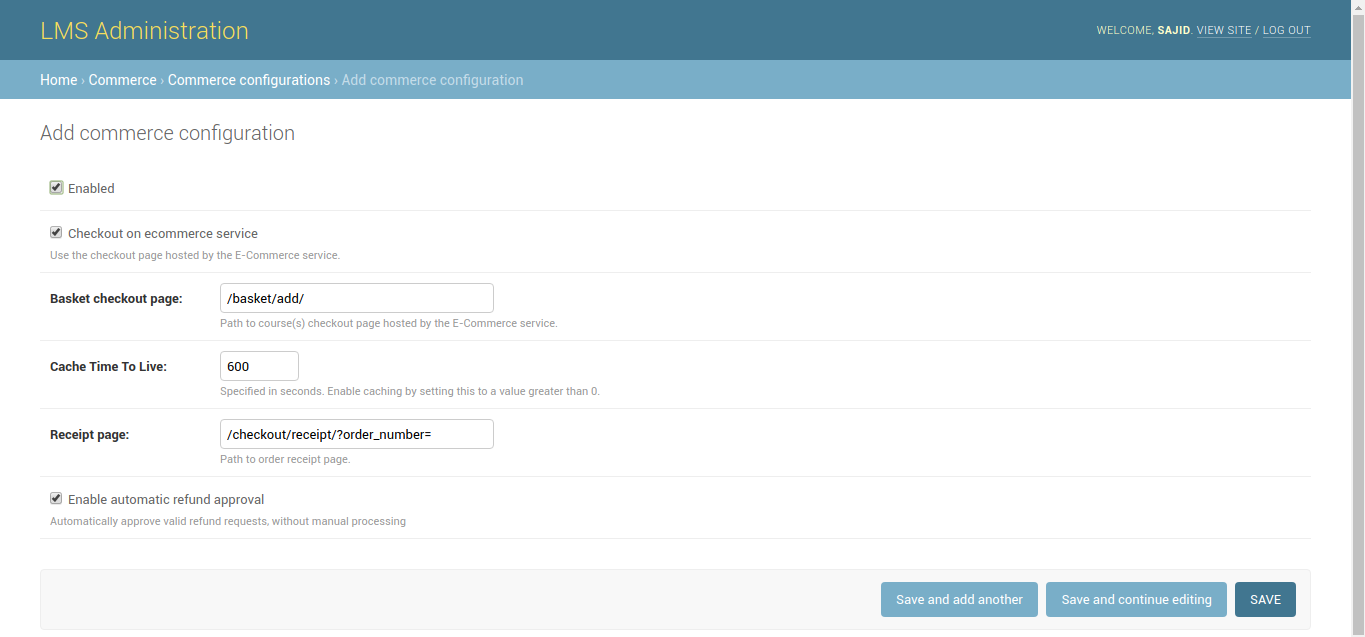
3. Configure Django to Use Oscar Ecommerce
We have then configured Django to use Oscar Ecommerce: Added Commerce Configuration: http://13.57.206.64/admin/commerce/commerceconfiguration/add/
Screenshots for reference:
 After saving the configurations, the configurations will be like:
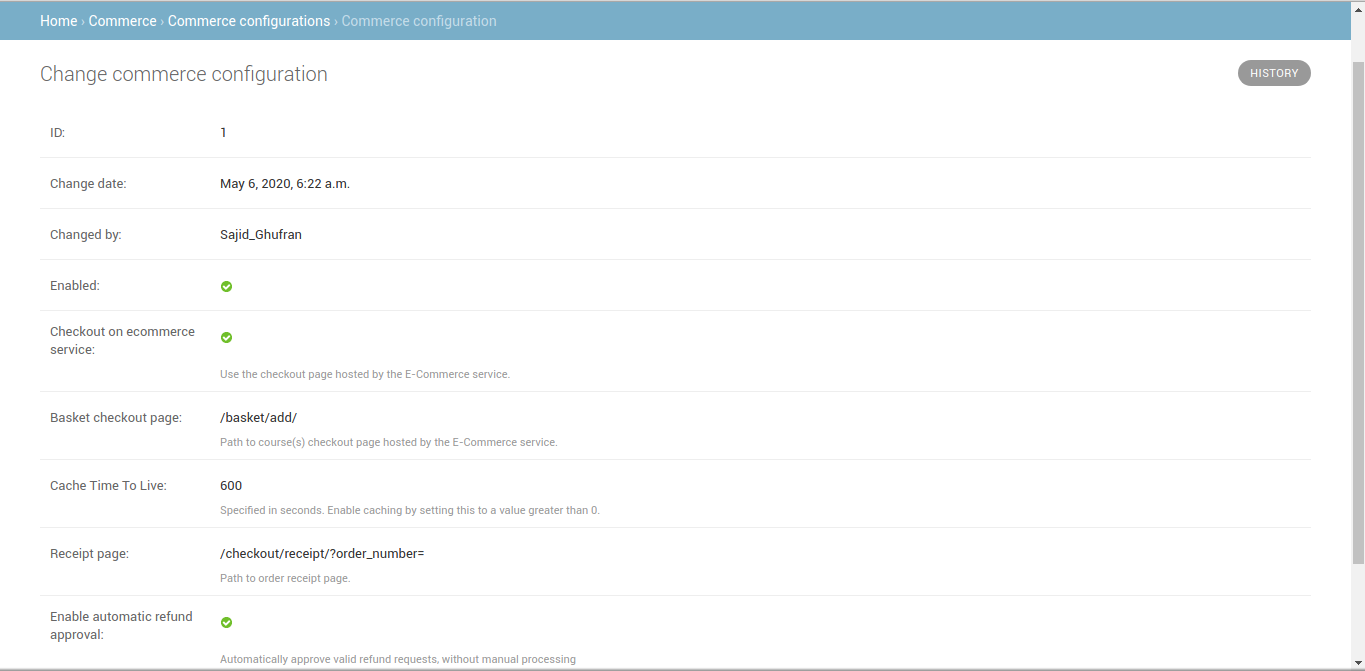
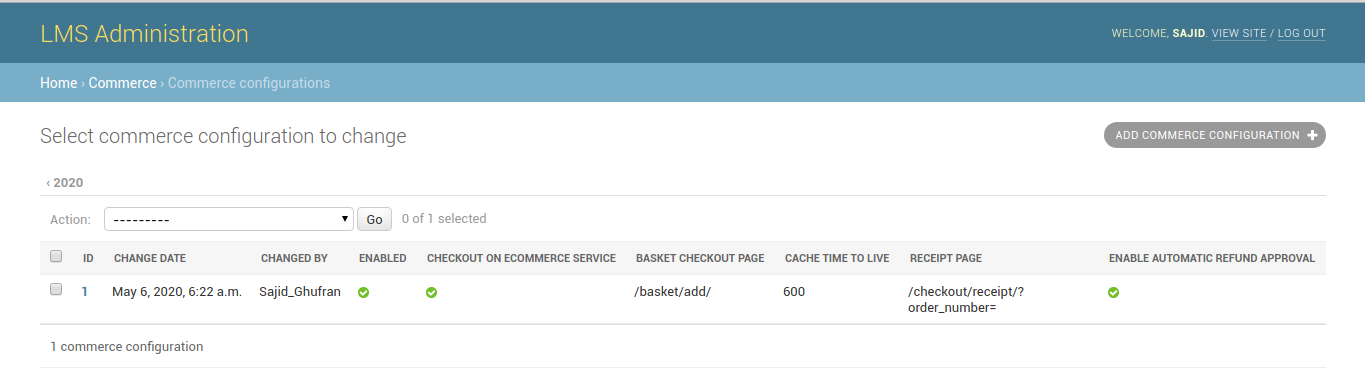
Note the id of the ecommerce site object. For e.g. 1 is the site-id in the above case:
Next, configure Oscar Ecommerce, issued the following commands from terminal:
sudo su ecommerce -s /bin/bash
cd ~/ecommerce
source ../ecommerce_env
This successfully ran the migration. We then issued this:
python manage.py create_or_update_site \
        --site-id=1 \
        --site-domain=my-edX.com:18130 \
        --partner-code=edX \
        --partner-name='Open edX' \
        --lms-url-root=https://my-edX.com/ \
                --payment-processors=paypal \
        --client-id=ecommerce-key \
        --client-secret=ecommerce-secret \
        --from-email=hqadir.knysys@gmail.com \
        --discovery_api_url=https://my-edX.com:18381/
We then modified /edx/etc/ecommerce.yml:
ECOMMERCE_URL_ROOT: https://edX.com:18130/
ISSUER: https://edX.com/oauth2
SOCIAL_AUTH_EDX_OIDC_ID_TOKEN_DECRYPTION_KEY: ecommerce-secret
SOCIAL_AUTH_EDX_OIDC_ISSUER: https:/edX.com/oauth2
SOCIAL_AUTH_EDX_OIDC_KEY: ecommerce-key
SOCIAL_AUTH_EDX_OIDC_LOGOUT_URL: https://edX.com/logout
SOCIAL_AUTH_EDX_OIDC_PUBLIC_URL_ROOT: https://edX.com/oauth2
SOCIAL_AUTH_EDX_OIDC_SECRET: ecommerce-secret
SOCIAL_AUTH_EDX_OIDC_URL_ROOT: https://edX.com/oauth2
NOTE: Please ensure your site is using SSL/TLS in production, and SESSION_COOKIE_SECURE is set to True. Decreasing security for development is fine, but using OAuth 2.0 without SSL/TLS in production is a potential security vulnerability.
However, if you are using http instead of https i.e. not using TLS, then set/add SESSION_COOKIE_SECURE: false in /edx/etc/ecommerce.yml
Restart ecommerce service:
sudo /edx/bin/supervisorctl restart ecommerce
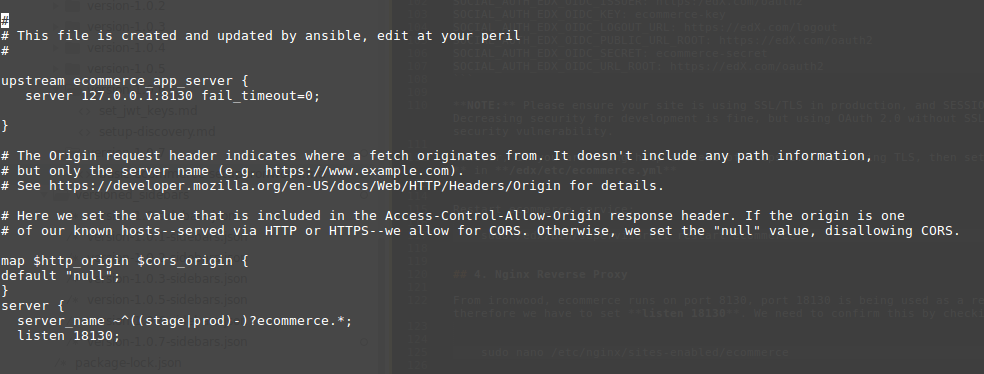
4. Nginx Reverse Proxy
Ecommerce runs on port 8130, port 18130 is being used as a reverse proxy to access ecommerce, therefore we have to set listen 18130. We need to confirm this by checking the nginx configurations:
sudo nano /etc/nginx/sites-enabled/ecommerce
Screenshot for reference:
5. Set Up JWT_PUBLIC_SIGNING_JWK_SET and JWT_PRIVATE_SIGNING_JWK
Note: Follow this link to generate JWT_PUBLIC_SIGNING_JWK_SET
6. Configure Discovery
Note: Follow this link for Discovery Setup