Uploading Static Content
Course creators can upload files and images to enhance the course with Studio. Once the file is uploaded, a link is created to use in the course content.
Uploading Files
In Edx Studio, navigate to the Content dropdown and select Files & Uploads to add your file or image.
Select Upload New File on the top right corner and Choose File on your local drive.
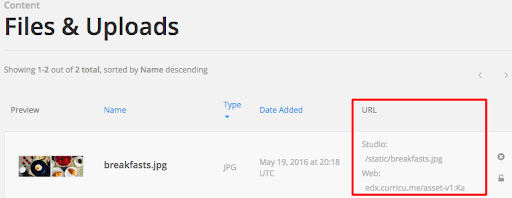
Once your file is uploaded. Two URL links are generated:
- Studio URL for users in a course. (Example: add files or images to a course component, update , or handout.
- Web URL for users outside of a course. (Example: add files or images to an email for someone not enrolled in the course.
See the Studio and Web URLs in the screenshot below:
 File upload image needs to be updated
Adding files to a Component
In a Unit, under Add New Component, click “HTML” and select “Text”.
Click the Insert/edit link icon. (see below)

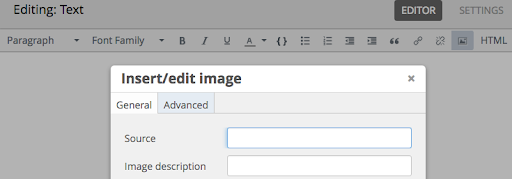
Adding images to a Components
In a Unit, under Add New Component, click “HTML” and select “Text”.
Click the Insert/edit image icon and paste the Studio URL into “Source”. (see below)
 Insert Image image needs to be updated
Click OK and then Save.
File for Download
Upload the file like a PDF or PPT (Powerpoint) in the Content dropdown under Files & Uploads.
Copy the Studio URL, it should look like this: /static/raw_turkey_instructions.pdf
Navigate to the Unit where you would like add the file and click Add New Component, select Text.
Type a description for the file and click Insert/edit link to enter the Studio URL and the Text to Display for the URL.
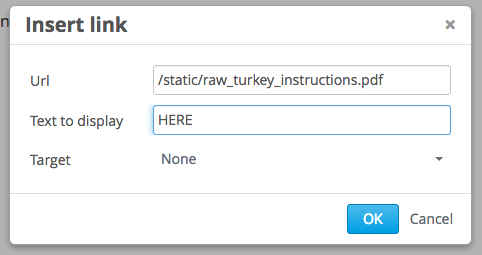
It should look like the screenshot below. Click Save.
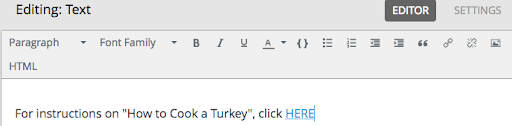
Test your link to the file by clicking HERE and Publish.
Organizing Files
Files can be organized by Name, File Type (example: pdf, .txt, .jpg, .png, .html) and Date Added.
Embedding PDFs
Add a "Text" Component to your unit
Click "Edit" on your new Component
Click "HTML" to edit the raw HTML
Copy and paste the following code to an empty area in the HTML editor:
<p>
<iframe title="[Replace me with the Name of the Document]" src="/replace/replace-me.pdf" width="800" height="402" marginwidth="0" marginheight="0" frameborder="0" scrolling="no">
Your browser does not support IFrames.
</iframe>
</p>
Replace src="/replace/replace-me.pdf" with the static URL for your PDF. (e.g. "/static/pdf-sample.pdf")
Replace title="[Replace me with the Name of the Document]" with the name of your PDF. (e.g. title="My PDF Document")
Optionally, modify the height and width values. Height and width are measured in pixels.